
What’s Included in Professional Painting Services in Dubai? A Step-by-Step Process Guide
“What exactly am I paying for?” is the question I get asked most often before a painting job starts. Homeowners in Dubai usually have a rough idea what professional painting services cost, but far fewer know what should actually happen between the first site visit and the final walkthrough. That gap is where disputes happen — a client expects two coats and gets one, or assumes furniture-moving is included when it isn’t, or discovers halfway through that “prep” meant a five-minute wipe-down rather than proper sanding and filling.
This guide walks through exactly what’s included in a genuinely professional painting service in Dubai, step by step, so you know what to expect — and what to ask for — before you sign anything. It’s written from the contractor’s side of the table, based on how a job should actually run from the first phone call to the final coat drying, not from a marketing brochure’s version of the process.
Step 1: Site Visit and Assessment
A proper painting service starts before any paint is bought. A site visit lets the painter assess wall condition, identify problem areas (damp patches, cracks, peeling, mold in bathrooms), measure surface area accurately, and discuss color and finish preferences in person rather than over the phone. This is also when furniture-moving, floor protection, and access arrangements (parking, building permissions for exterior work) get agreed. Any painting company quoting a firm price without ever seeing the property is guessing — and that guess usually gets corrected upward once work has started.
Step 2: Surface Preparation — Where the Real Work Happens
This is the step that separates a paint job that lasts two years from one that lasts seven. Proper preparation typically includes:
Cleaning
Walls are washed to remove dust, grease, and grime — especially important in kitchens, where cooking residue leaves a film that stops paint from bonding properly. Dish soap actually leaves its own residue behind; a proper degreaser or TSP-based cleaner is what a professional crew should be using in these areas.
Patching and repairs
Nail holes, small cracks, and minor drywall damage get filled and smoothed. Larger structural repairs (significant cracks, water damage, extensive drywall replacement) are usually a separate line item — a written quote should say clearly what level of repair is included versus what triggers an additional charge.
Sanding
Filled areas and rough surfaces are sanded smooth, then wiped down to remove dust before anything else happens. Skipping this step is one of the most common shortcuts — it’s invisible until the topcoat goes on and every patch shows through as a slightly different texture.
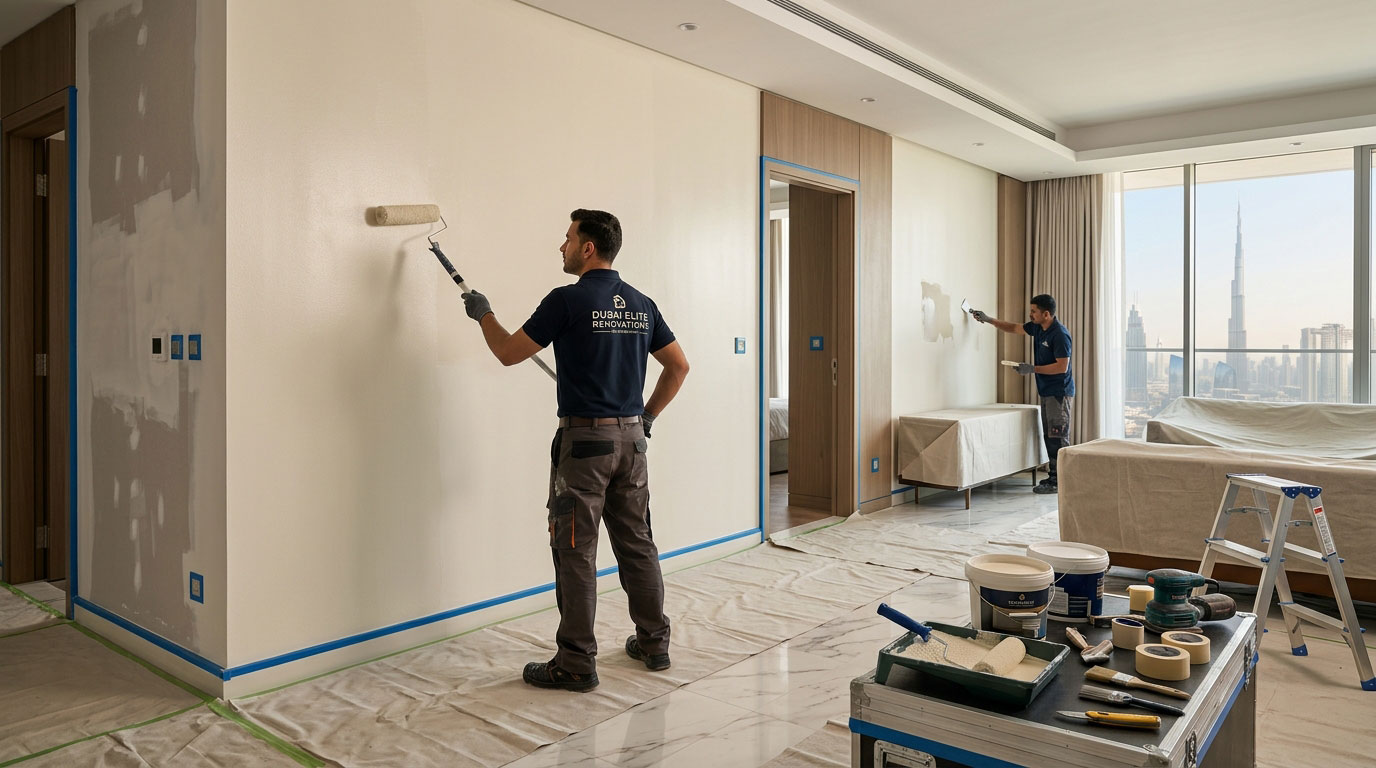
Masking and protection
Skirting boards, window frames, switches, and fixtures get taped off. Floors are covered with drop sheets, and furniture is either moved to the center of the room and covered, or removed from the space entirely depending on scope.
Step 3: Priming — Not Always Needed, but Never Optional Where It Is
Primer isn’t applied to every surface by default — a crew that primes everything regardless of condition is usually padding the job rather than being thorough. Primer genuinely matters in specific situations: bare drywall, patched or repaired areas, water or smoke stains, surfaces with tannin bleed (common on certain wood types), glossy surfaces that need to be dulled for adhesion, and any significant color change (going from a dark wall to a light one, for example). A professional painter should be able to tell you exactly where primer is being used and why — “we’ll prime it” without specifics is a vague answer to a question that has a precise one.
Step 4: Paint Application
Once primer (where needed) has fully dried — typically overnight for water-based products — the actual painting begins. A professional crew works methodically: cutting in along edges, corners, trim, and ceiling lines first with a brush, then rolling the main wall area into the still-wet cut-in line. This sequence is what produces a seamless, even finish rather than visible brush-mark boundaries where the edge work meets the rolled area.
Two coats is the standard for full, even coverage in most professional painting services — a single coat almost always shows uneven color and wears unevenly, particularly under Dubai’s strong natural light. Drying time between coats matters too; rushing the second coat before the first has properly cured is a common cause of early peeling and an uneven finish. If a quote specifies only one coat without a clear reason, treat that as a red flag rather than a cost-saving.
Step 5: Quality Check and Walkthrough
Before a job is considered finished, a proper crew reviews the work under good lighting — natural daylight where possible, since artificial light can hide inconsistencies that show up clearly the next morning. This is when touch-ups happen: missed spots, roller marks, uneven edges. A walkthrough with the homeowner, room by room, should happen before final payment — not after, once the crew has already left.
Step 6: Cleanup
A full cleanup is a standard part of any professional painting service — drop sheets and masking tape removed, floors swept or vacuumed, furniture moved back into place, and all paint tins, brushes, and waste materials taken off-site. If a company treats cleanup as optional or an add-on, that’s usually a sign the rest of the job will be handled the same way.
What’s Usually Excluded (and Needs a Separate Agreement)
A clear scope protects both sides. Items that typically fall outside a standard painting service, and should be discussed upfront rather than discovered mid-project, include: major drywall or plaster repair, wallpaper removal (a separate process entirely — see our Wallpaper vs Paint guide if you’re deciding between the two), mold remediation beyond surface treatment, and extensive furniture removal for fully occupied homes. None of these are unreasonable to request — they just shouldn’t be assumed as included in a base painting quote, and asking about them directly during the site visit avoids an awkward conversation once work is already underway.
What a Proper Written Quote Should Specify
Before agreeing to any painting service, the written quote or contract should clearly state: which rooms and surfaces are included (walls, ceilings, trim, doors, cabinets — each is a separate decision), the number of coats, the level of prep and repair work covered, where primer will be used, the specific paint brand and product line (not just “quality paint”), the sheen or finish level, who is responsible for moving furniture, how cleanup is handled, the project timeline, and anything explicitly excluded. If you’re comparing multiple quotes, our guide to choosing a painting contractor covers how to evaluate quotes side by side rather than just comparing the bottom-line number.
Interior vs Exterior: The Process Shifts
Everything above describes the core process for interior work. Exterior painting in Dubai adds steps specific to the climate — pressure washing as part of surface prep, weather-rated primers and topcoats formulated to resist UV fading and heat-driven chalking, and scheduling around the cooler months (typically October to March) when humidity and temperature make for a more even cure. If you’re weighing which parts of your home to prioritize, our Interior vs Exterior Paint guide breaks down exactly where the materials and process differ.
Typical Timeline for a Professional Painting Service
Timelines vary by property size and scope, but a realistic guide helps set expectations before work starts. A single room (interior walls and ceiling, standard prep) typically takes one to two days including drying time between coats. A full one-bedroom apartment usually runs two to three days, a two-to-three-bedroom apartment three to five days, and a full villa interior anywhere from seven to fourteen days depending on the number of rooms and the condition of existing surfaces. Exterior villa painting adds its own timeline, generally five to ten days depending on facade size, weather scheduling, and whether extensive prep (rendering repairs, pressure washing, weatherproofing) is needed first.
These timelines assume proper drying time is respected between coats — a crew that finishes noticeably faster than these ranges is very often skipping drying time, cutting prep short, or reducing the number of coats, all of which show up as problems within the first year rather than immediately.
Materials and Tools a Professional Crew Should Be Using
The materials and tools used are as much a part of “the service” as the labor itself. A professional crew should be using: proper surface cleaners (degreasers or TSP-based solutions, not household dish soap, which leaves a residue that interferes with adhesion), quality filling compound for patching, appropriate-grit sandpaper for smoothing without damaging the substrate, painter’s tape rated for clean removal without pulling existing paint, drop sheets rather than thin plastic sheeting that shifts and tears, and named-brand primers and paints matched to the surface and finish — Jotun, Dulux, and similar established brands hold up reliably in Dubai’s heat and humidity, which is why they dominate professional use here. If a quote doesn’t name the specific paint product being used, that’s worth asking about directly before signing.
Common Shortcuts to Watch For
Knowing the proper process also means knowing what a rushed or corner-cutting job looks like. A few signs worth watching for during the work: sanding skipped entirely after patching (you’ll see slightly raised, uneven patches once paint is applied), primer applied everywhere regardless of surface condition (a sign of habit rather than assessment), the second coat applied before the first has properly dried (often visible as a slightly tacky or uneven sheen), and edges cut in after the wall is rolled rather than before (produces visible brush-line boundaries instead of a seamless blend). None of these are difficult to spot if you know to look for them during a walkthrough partway through the job — which is exactly why a mid-project check-in, not just a final one, is worth doing on any larger project.
How the Process Changes by Room Type
The core steps stay the same, but the details shift depending on which room is being painted. Kitchens and bathrooms need moisture- and mold-resistant paint formulations and more thorough degreasing during prep, since cooking residue and steam both interfere with adhesion if not properly removed first. High-traffic areas — hallways, staircases, children’s rooms — benefit from a washable finish (satin or eggshell rather than flat matte) so scuffs and marks can be wiped down without damaging the paint film. Ceilings are almost always finished in flat or matte to minimize glare and hide minor surface imperfections, while trim, doors, and skirting boards typically get a semi-gloss finish for durability and easy cleaning. A professional crew adjusts sheen and prep intensity room by room rather than applying one blanket approach across the whole property — and it’s worth asking your painter to confirm this room-by-room plan before work starts, rather than assuming it’s been factored in.
Office and commercial spaces add their own considerations too — scheduling around business hours or after-hours work to minimize downtime, low-odor or fast-drying products where the space needs to stay usable, and often a stricter cleanup standard since the space is client-facing. Our Office & Commercial Painting guide covers how this differs from a typical residential job in more detail.
Warranty and Touch-Ups
Reputable painting companies offer a workmanship warranty, typically between six months and two years, covering issues like peeling or cracking that appear within that window. Ask about this before signing — a company confident in its prep and application process will have no hesitation putting a warranty in writing.
How Vision Three Delivers This Process
We follow this exact sequence on every job — proper site assessment, real surface preparation (not a quick wipe-down), primer applied only where it’s genuinely needed, two coats as standard, a full walkthrough before final payment, and complete cleanup on handover. Every quote specifies paint brand, number of coats, and scope in writing before work begins. For a full cost breakdown by room and property type, see our Painting Cost Guide, and if you’re deciding between two well-known brands for your project, our Jotun vs Dulux comparison breaks down which performs better for Dubai’s climate.
Why the Process Matters More Than the Headline Price
Two quotes with the same bottom-line number can represent completely different jobs once you look at what’s actually included. A lower quote that skips proper sanding, uses a single coat, or leaves cleanup as an afterthought will almost always cost more over time — either in an earlier repaint, in touch-ups the crew won’t stand behind because there was never a warranty, or simply in a finish that never looked quite right to begin with. Understanding the process outlined above isn’t about becoming a painting expert yourself; it’s about being able to ask the right questions and recognize when a quote or a crew is cutting corners you won’t notice until the paint has been on the wall for a few months.
Frequently Asked Questions
What is typically included in a professional painting service in Dubai?
A standard service includes a site assessment, surface preparation (cleaning, patching, sanding), primer where needed, two coats of paint, a quality walkthrough, and full cleanup. Major repairs and wallpaper removal are usually separate line items.
How many coats of paint should a professional service include?
Two coats is the standard for even, durable coverage. A single coat is rarely sufficient and usually shows uneven color within a short period, especially under Dubai’s strong natural light.
Is surface preparation really necessary, or can it be skipped to save cost?
Preparation accounts for most of a paint job’s longevity. Skipping cleaning, patching, or sanding is the single biggest reason paint jobs fail early — the topcoat is what you see, but the prep is what makes it last.
Do professional painters move furniture?
Yes, reputable painting services move small furniture and cover larger pieces with drop sheets as part of the standard process. Full furniture removal for occupied homes is sometimes a separate arrangement — confirm this before work starts.
Is primer always needed before painting?
No — primer is needed on bare drywall, patched or repaired areas, stained surfaces, glossy surfaces, and significant color changes. A professional painter should specify exactly where primer is being used rather than applying it everywhere by default.
What should I check in a painting quote before signing?
Confirm the rooms and surfaces included, number of coats, level of prep and repair covered, paint brand and finish, who moves furniture, cleanup responsibility, timeline, and anything explicitly excluded.
Do professional painting services in Dubai offer a warranty?
Most reputable companies offer a workmanship warranty of six months to two years covering issues like peeling or cracking. Ask for this in writing before the job begins.
How long does a professional painting service take?
A single room typically takes one to two days, a full apartment two to five days depending on size, and a full villa interior seven to fourteen days. Exterior villa work generally runs five to ten days depending on facade size and weather scheduling.